

Ventilation heat loss overview
Buildings lose heat through conduction - heat travelling through the fabric (roof, walls, windows, floor); and through ventilation - cold air leaking in through gaps in the building, warm air leaking out.
Conduction heat loss (often referred to as ‘fabric heat loss’) is pretty simple to calculate once you know the materials that make up the building in question. You know how big each exposed surface of the building is, you know your outdoor design condition and how warm you want it to be inside, and you have a reasonably good idea of the conductivity (U-value) of the material that the heat is flowing through based on what that material is.
Calculating ventilation heat loss is a bit more complicated. Really, there are two types of heat loss here –
Uncontrolled infiltration – air leaking in through gaps around the windows, down poorly blocked flues, through poorly sealed floors, etc.
Deliberate ventilation – fresh air intentionally supplied into the building and stale air removed from the building to maintain a healthy air quality in the building. Older buildings typically don’t have any kind of active ventilation system. They are leaky enough that you just don’t need it. But newer buildings will typically either have trickle vents for supply and extract fans for exhaust, or centrally ducted mechanical ventilation with heat recovery (MVHR) systems.
Historically we’ve calculated ventilation heat loss by assigning an “air changes per hour” value to each room based on it’s type and age. This value represents how many times all the air in the room gets fully replaced in an hour. That method was very conservative however and also didn’t do a good job of physically modelling how infiltration works.
Based on the 2026 update to the CIBSE domestic heating design guide we’ve now shifted our ventilation calculation method to be based on whole home air-permeability. This new calculation method does a much better job of accurately assessing ventilation heat loss
1. Calculating the air permeability of the whole building (m³/hour/m² @ 50Pa)
Uncontrolled infiltration is air leaking through small gaps in the building’s envelope. Once you’ve done the calculations (more on which below), you end up with some flow rate of fresh air (in m³/hour) leaking into the building and an equivalent flow rate of stale air leaking out.
How large that flow rate is for a particular building depends on how big the external surface area is (in m²), and on how many gaps there are per unit of surface area.
To compare between buildings of different sizes, you divide by the property’s external surface area to get a result in m³/hour/m² at a pressure-drop of 50 Pascals (50Pa).
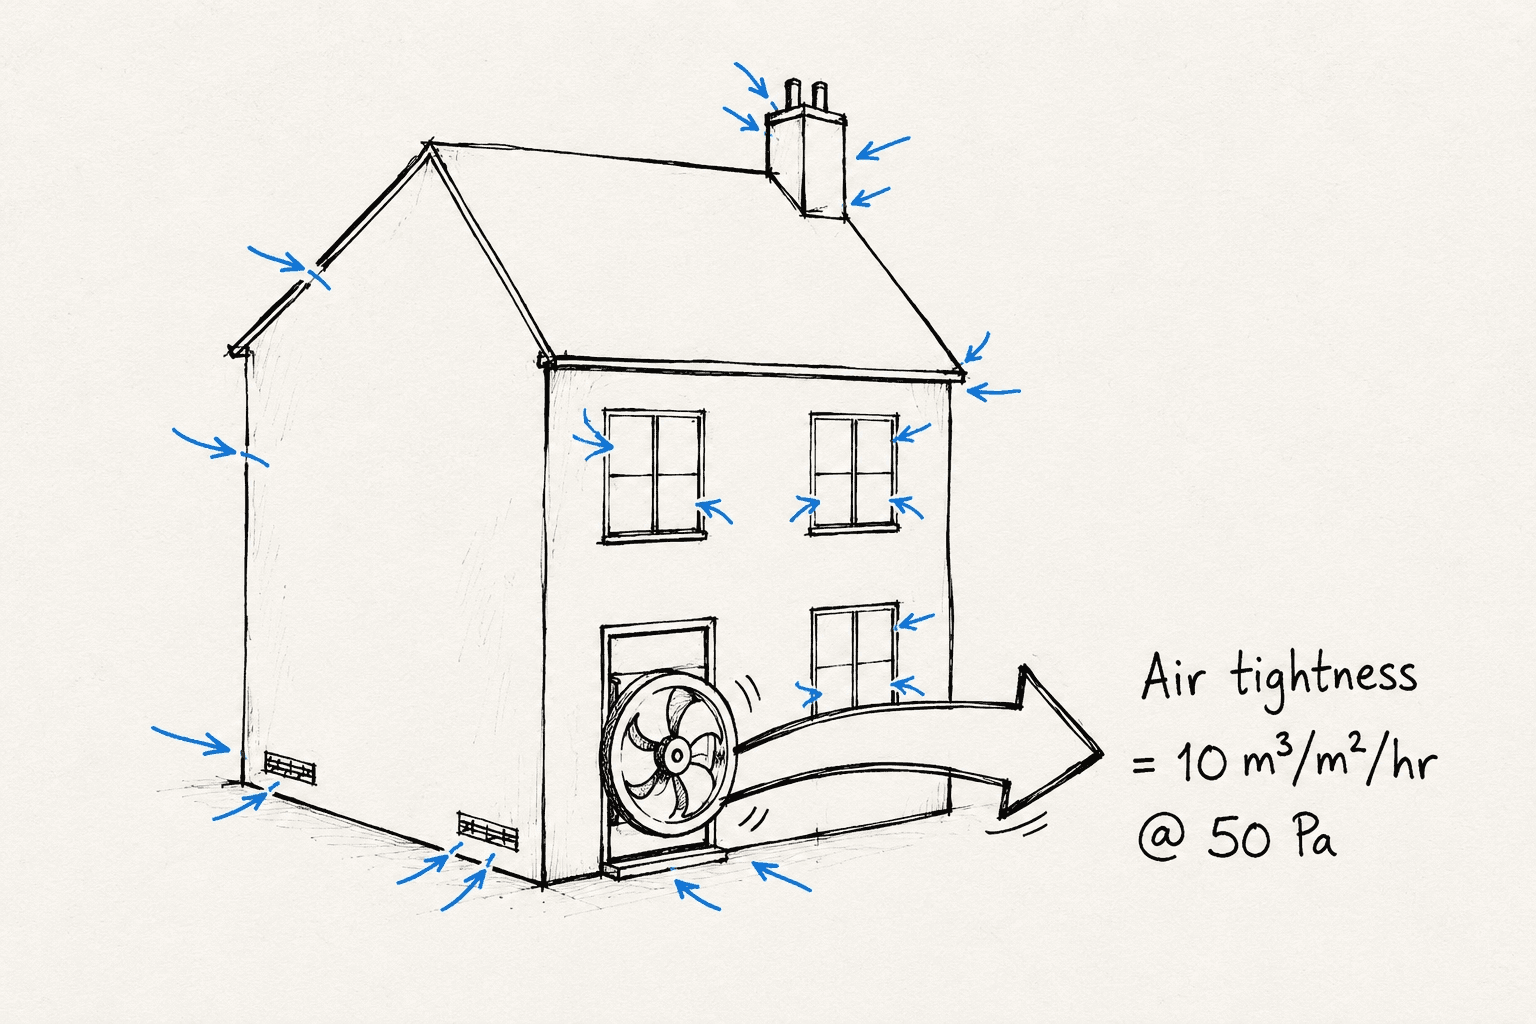
This is really easy if you’re doing a blower door or pulse test as you’ll get a specific result – and it’s also nice and simple if the property was built to recent building regs which specify a limiting and a notional air permeability that the building must meet. Recently built buildings will also have the design or test air tightness value included on their EPC, so we pull that through into Spruce for you in those cases.
But most retrofit customers won’t have done – or won’t want to pay for – a blower door test. So in these cases we’ll help you calculate the air permeability automatically in Spruce as you create the floorplan based on the building’s size and construction.
2. Adjusting pressure difference based on how exposed/shielded the building is (50Pa >> ~4Pa)
The standardised measure of air permeability is given at a pressure difference of 50Pa (between the inside and outside of the building). But no building will actually ever see such a big pressure drop - typical values are closer to 4Pa, but it will depend on how exposed the building is.
So we need to apply a conversion factor to the 50Pa result to something that represents these more typical conditions. That conversion factor is based on:
How tall the building is - Taller buildings will be more exposed to the wind and so see a higher pressure difference across them.
How shielded the building is - Buildings in the middle of a city will be way less exposed than buildings out in the open with no trees or buildings around them. The more shielded the building, the lower the pressure difference the building will see.
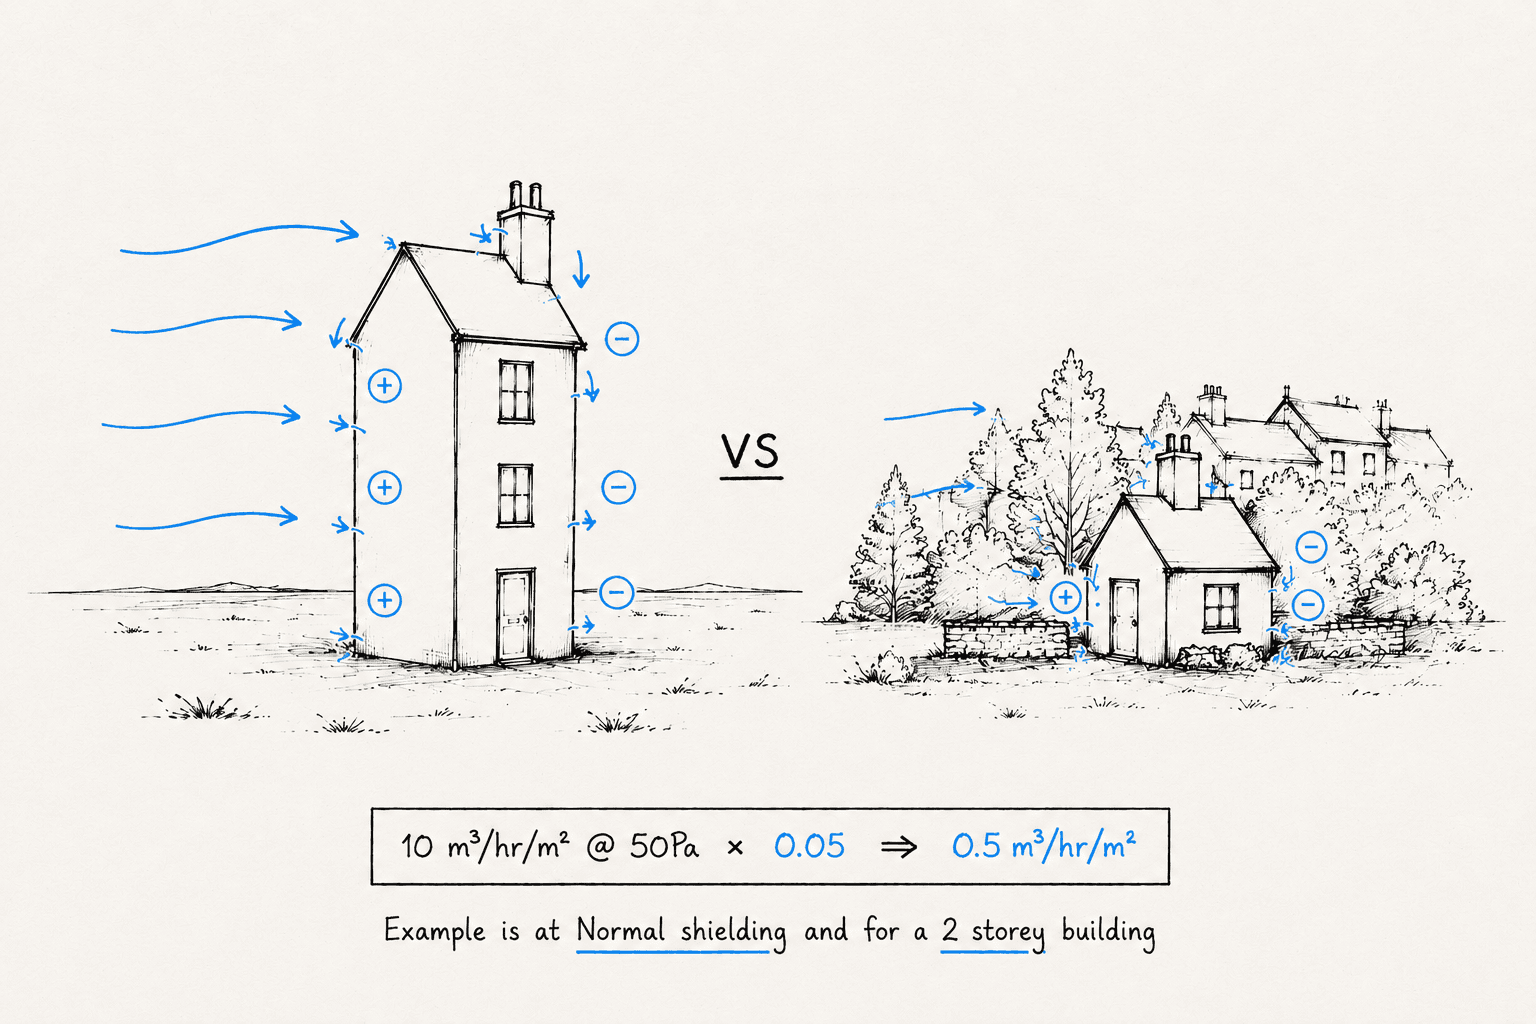
For example, if you have a normal level of shielding and a 2 storey building, the conversion factor is 0.05.
So 10 m³/hr/m² @ 50Pa x 0.05 ⇒ 0.5 m³/hr/m² @ actual conditions.
3. Allocating whole-building result to each room
Once we’ve established the whole-home air-permeability, we apply that result to each room based on the exposed surface area of each room. This includes the external wall area, roof area, and ground floor area, as well as any surface that’s adjacent to unheated spaces like a garage. (It does not include party walls as we assume that there’s a heated space on the other side.)
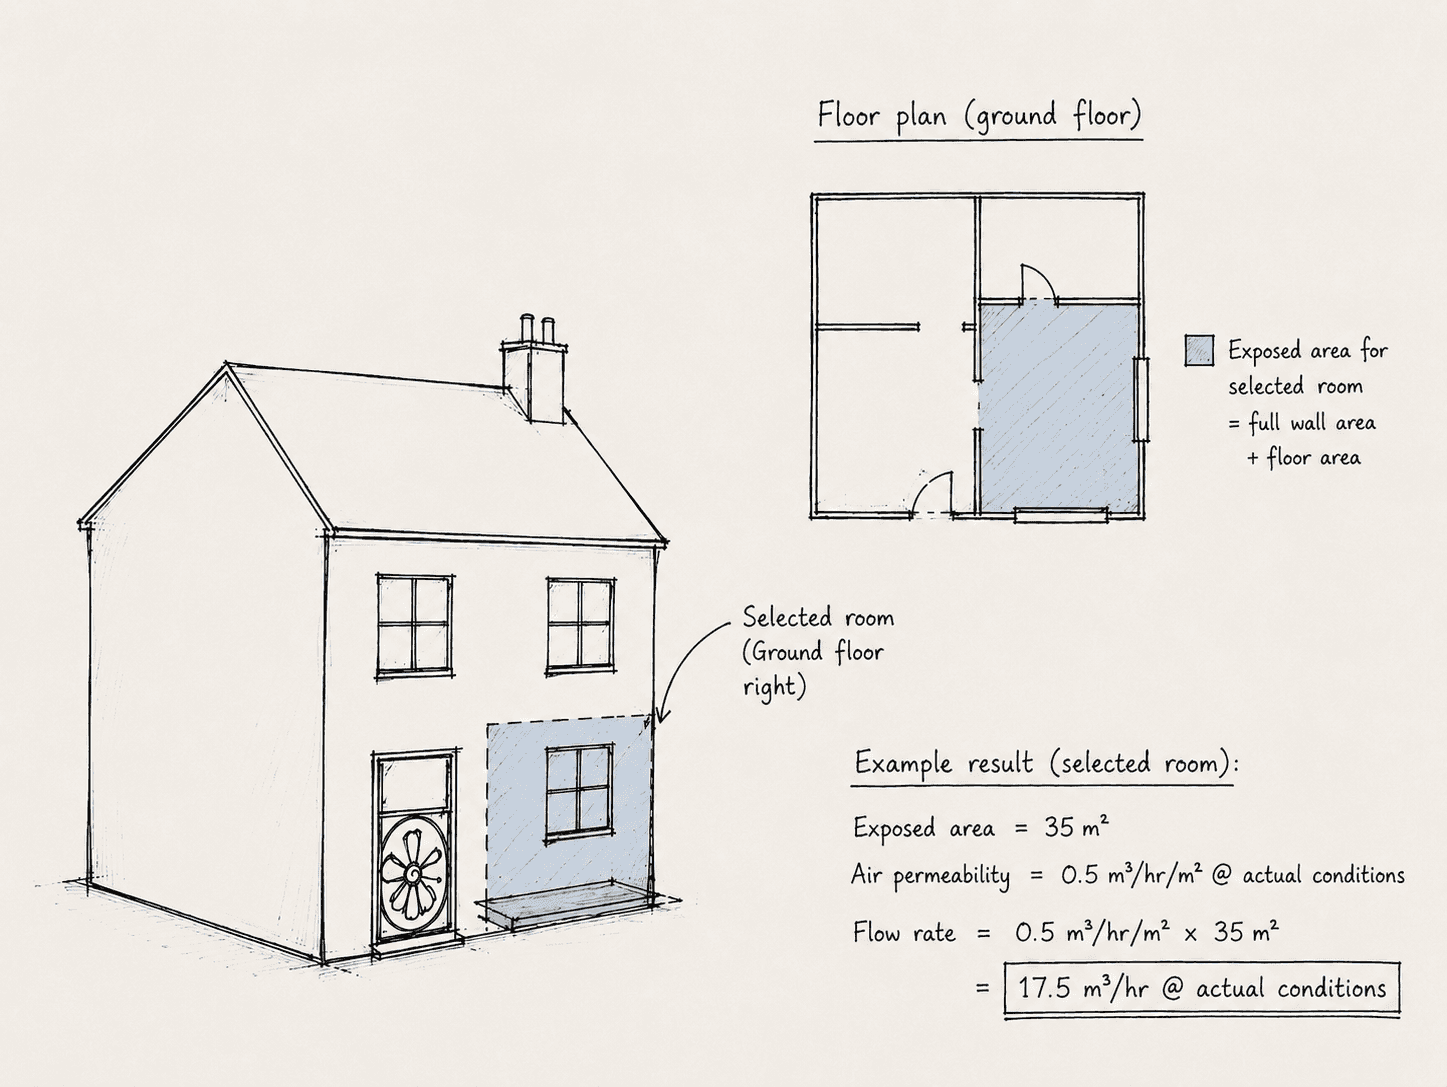
For example a room on the ground floor might have:
15m² ground floor area
20m² external wall area (including windows and doors)
So it has an exposed area of 35m². If the whole-home air permeability is 0.5 m³/hr/m² @ actual conditions then the uncontrolled infiltration into that room will be 0.5m³/hr/m² x 35m² ⇒ 17.5 m³/hr @ actual conditions
4. Adding room-level openings (vents/flues etc)
The whole-home air permeability result does not include the contribution of vents, flues or fans to the infiltration because those items are blocked off during a pressure test. So the additional infiltration from those openings need adding to each room.
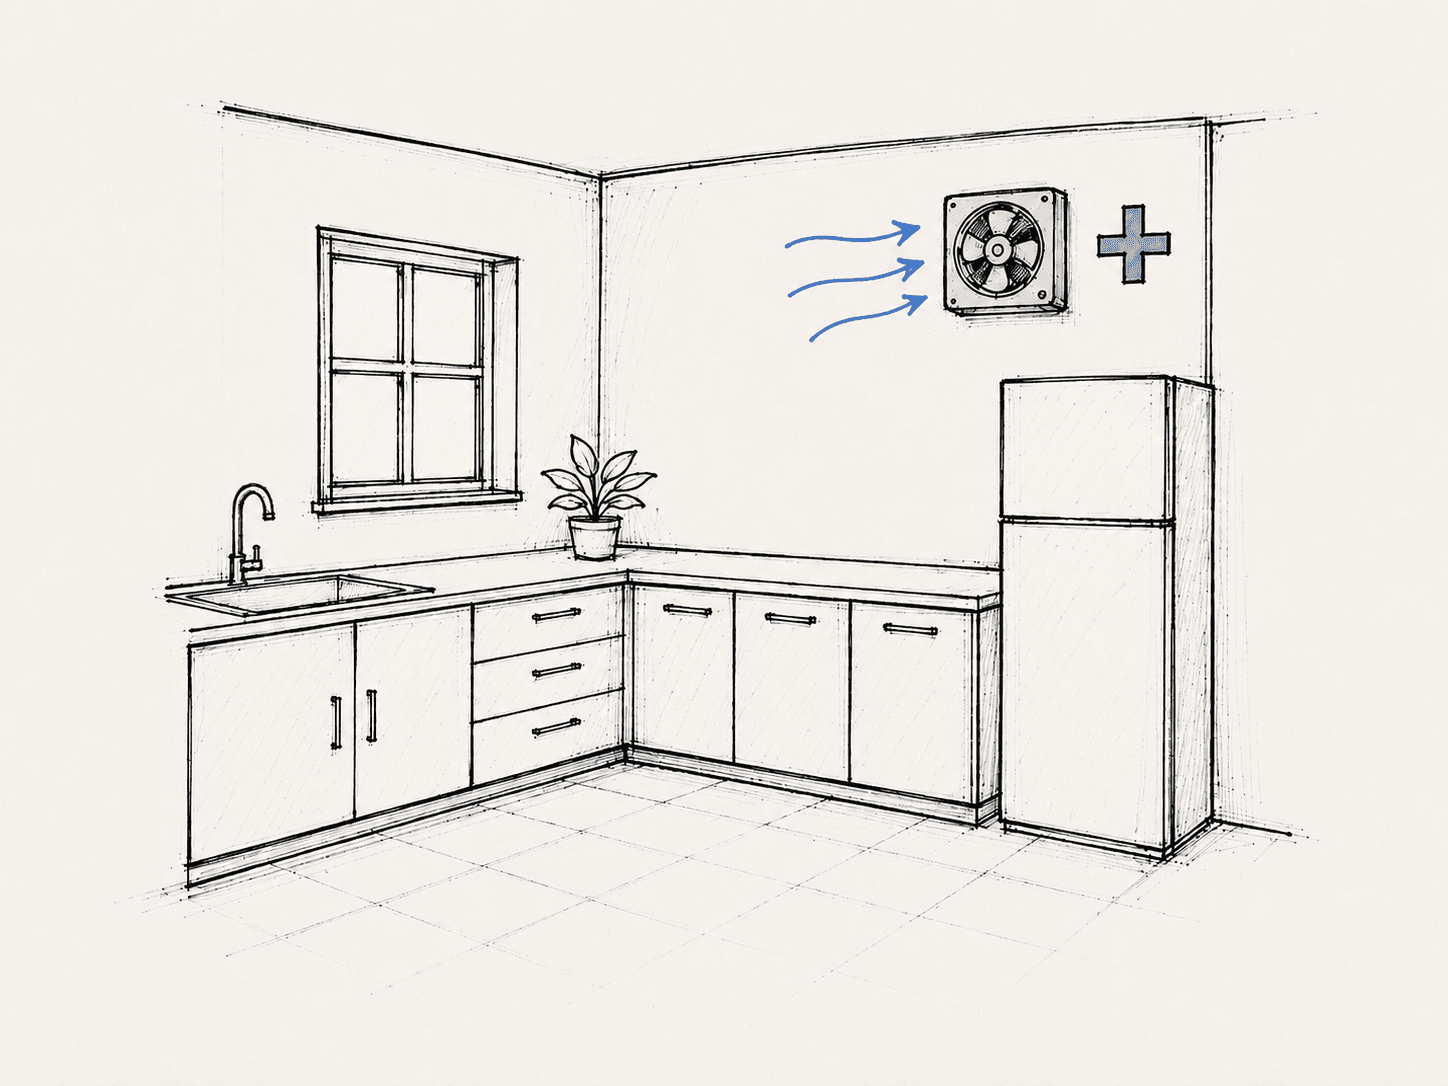
Note that the sort of vents that count here are terminal/extract vents such as intermittent extract fans or chimneys. Supply vents such as trickle vents and air bricks do not count.
Our example living room doesn’t have any extract vents so we have nothing to add in this case.
5. Convert to ACH
We now have the actual flow rate of leakage into the room at normal conditions in m3/hour. To convert that into a familiar ACH value, we divide by the room volume.
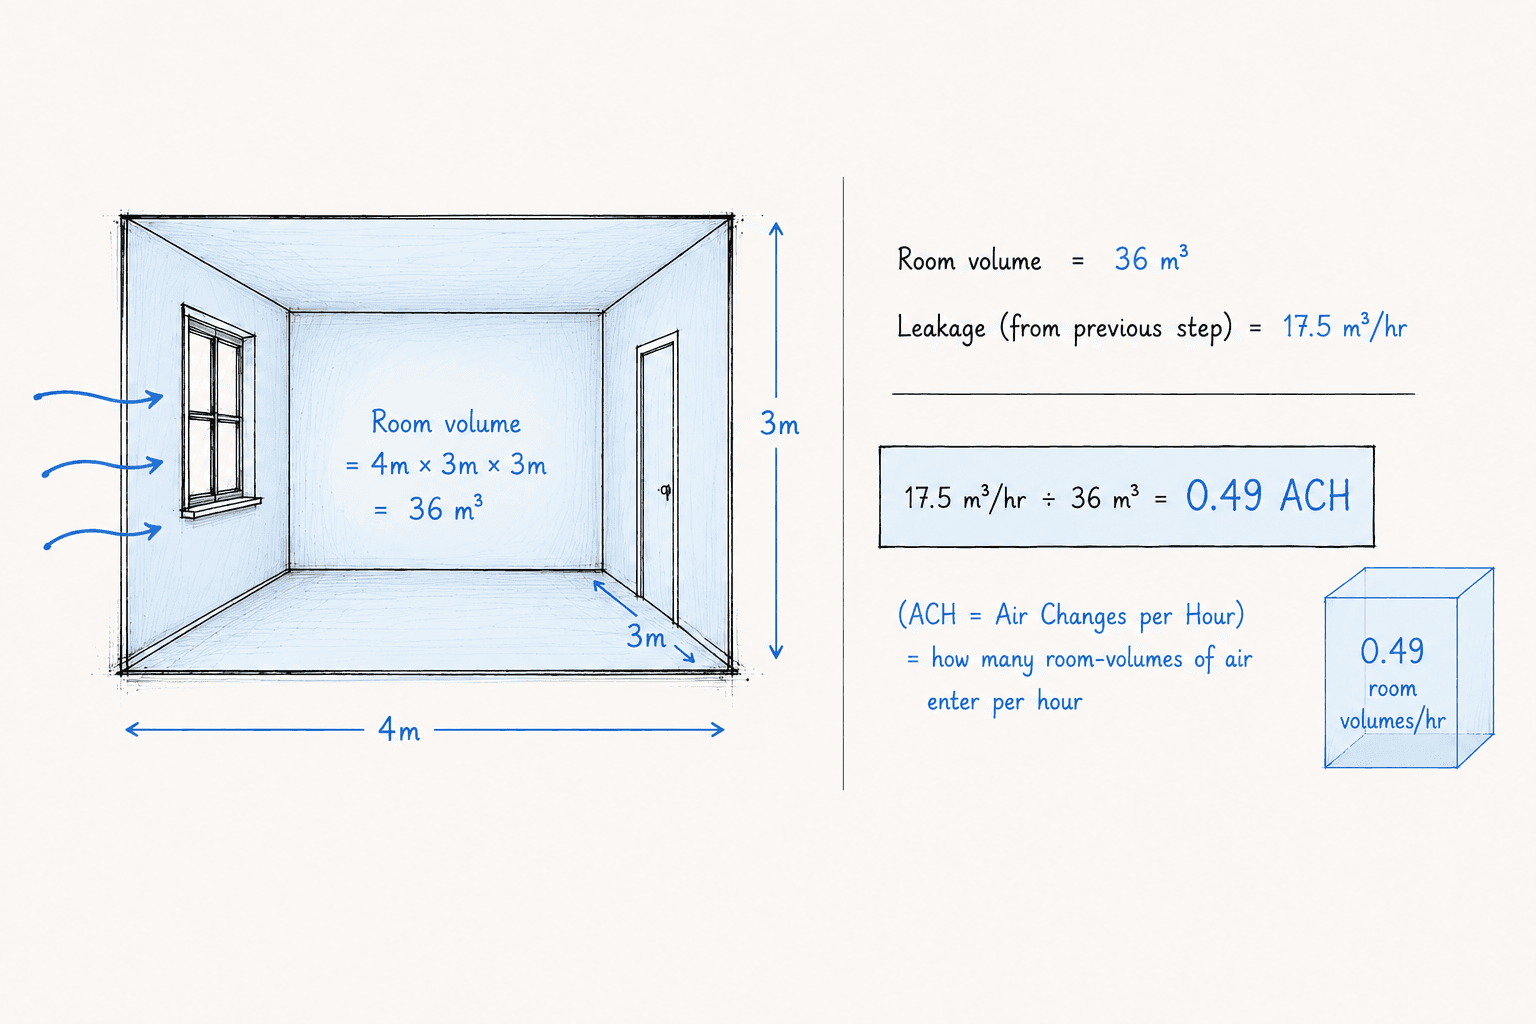
In our example case we have a room level flow rate of 20.2 m³/hour at actual conditions and the room volume is 36 m³
17.5 m³/hr ÷ 36 m³ = 0.49 ACH
6. Room-level minimum ACH – is there enough fresh air?
Buildings require a certain amount of fresh air for the users to be comfortable and healthy. If the uncontrolled infiltration is very low, the people living in that room will end up opening the windows when the room gets stuffy. To account for this, the standard mandates a room-level minimum ACH of 0.5 for habitable rooms.
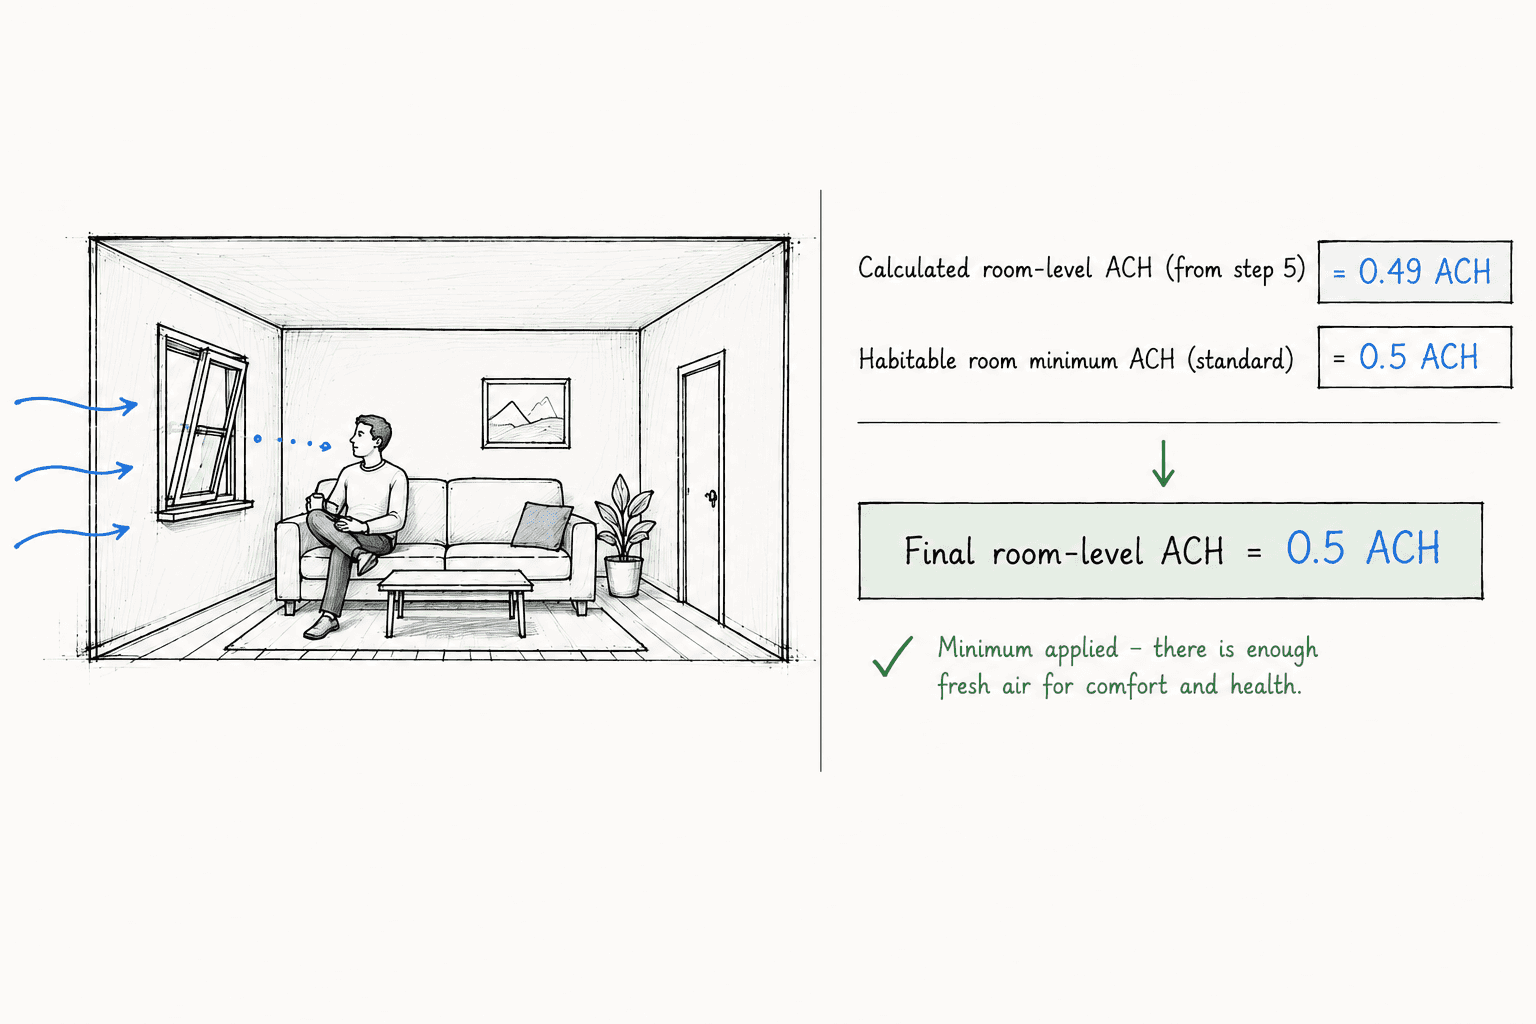
Our example room is a living room so the habitable room minimum of 0.5 applies. The calculated result is less than 0.5 so we apply the minimum.
The final room level result = 0.5 ACH
Ventilation heat loss is one of the more complex parts of an accurate heat loss calculation, and as this article shows, getting it right involves a lot more than assigning a generic air changes per hour value to a room. Spruce handles the full ventilation heat loss calculation automatically, from whole-home air permeability through to room-level ACH, so you can be confident your system designs are built on accurate numbers. If you'd like to see how it works in practice, get in touch with the Spruce team.
Sources:
The Building Regulations 2010 - Dwellings
CIBSE DHDG 2026
BS EN 12831-2017